Tuesday, September 21, 2010

Ruger Charger Review: Summary

Ruger Review, Ruger 22 Charger Review, Ruger Charger Review, 22 Pistol Review
I have broken my review of the Ruger 22 Charger (or Ruger Charger) pistol into several parts.  As I continue to shoot the Ruger Charger pistol, I will continue to add more parts to this review.  If you go to any of these parts below, you will see many detailed photos and dialog.
  1. Ruger Charger Review - Part 1: Introduction, In the Box, and Exterior Features
  2. Ruger Charger Review - Part 2: Disassembly
  3. Ruger Charger Review - Part 3: Indoor Range Test Results
  4. Ruger Charger Review - Summary (this post)
The pistol is shown below with a NcStar 2-7x32E pistol scope installed.  Soon I'm going to try out a Bushnell TSR-25 Red Dot scope on this pistol and I believe it will be even more fun for plinking.  I may sacrifice a little accuracy with the red dot, but with the cost of ammo, I can swap the optics and rezero as/if needed.


Pros:
  • Built on the Ruger 10/22 reliable platform
  • Great accuracy
  • Same reliable rotary magazine as the Ruger 10/22 and accepts same high capacity magazines
  • Attractive wood laminated grip
  • Nice smooth ergonomic feel of the grip/stock
  • Bipod included
Cons:
  • Front end heavy if your shooting it free hand while using a normal pistol hold at the grip
  • A better trigger would be nice, but you can always upgrade with aftermarket parts.
  • Price maybe?  I'm a little surprised that the cost is about $80 more than the 10/22 rifle, but you do get a case, bipod and laminated stock, all of which are clearly added costs.
Bottom Line:
Ruger has been producing the standard version of their 10/22 rifle since 1964 and that alone has to tell you something.  Ruger taking that platform and turning it into a pistol version is near genius.  The Ruger Charger pistol has built into it over 45 years of development to produce one of the most reliable pistol shooting platforms on the market.  It is extremely accurate and accepts the same rotary magazine and after market high capacity magazines as the 10/22 rifle.  If your looking for a pistol to shoot from a bench or rest at targets or game, you should definitely check out the Ruger 22 Charger.


Monday, September 20, 2010

Ruger 22 Charger Review - Part 3: Indoor Range Results

For my indoor range test during my Ruger Charger Review, I decided to utilize a 14 yard range in my basement.  At some point I'm sure I will get some range test results at a longer range, but for now it is hard to beat the ease of shooting at your own house.  The scope I'm using on the pistol is a NcStar 2-7x32E Pistol Scope and is shown below mounted on the pistol.  You can see the other parts of the review by clicking on these links; Part 1: In The Box and Exterior Features and  Part 2: Disassembley.


For this test, I decided to shoot the following .22 Long Rifle ammunition since I already had it on hand.
For each of these tests, I shot a minimum of five 5-shot groups from 14 yards while using the bipod from a bench.  You can see the results below.

CCI Select Round Nose 40 grain

Federal Classic Copper Plated Solid 40 Grain

Remington Target Round Nose 40 Grain

Winchester Super-X Power Point Hollow Point 40 Grain

Winchester Xpert 22 Hollow Point 36 Grain

The above results have been tabulated below showing the minimum, average, maximum, and projected 50 yard equivalent average.  I included this 50 yard equivalent because it will be helpful when comparing against other data on the Internet.  Once I get some real first hand data at 25 and 50 yards, I will add another post with those range test results.


The best group I shot at 14 yards was 0.14" and the worst was 0.70" with an average of all my groups of 0.42".  I think I could have had better results if I would have used a different scope.  I found the scope's eye relief to be wrong for my shooting preference and was having side to side sight picture drift as you can see with the windage shifts on the targets above.

Bottom Line:
Overall I'm very please with the shooting results from the Ruger Charger pistol.  With a different scope and more practice, I believe my results could be better, but I'm not complaining.  The accuracy of this pistol is clearly good and Ruger hit another home run with the Ruger Charger pistol.  If I could change one single item, it would be to add a better trigger.  The trigger pull measures about 4.67 pounds I would prefer it to be lighter for target shooting.


Friday, September 17, 2010

Do-All .22 Bullet Box Review (Bullet Trap Review)

Wouldn't it be nice to have an indoor shooting range in your own basement?  Even if it would only allow rimfire weapons, it would still be great.  The other day, I set out to make a spot in my basement where I could start my own indoor range and shoot my .22 pistols.  I decided to do two things.  The first was to make a backstop that would be able to stop and absorb the bullets without a formal metal trap.  The second was to purchase the Do-All 17/22 Bullet Box (Bullet Trap) to see if it would reduce the wear and tear on my wooden (absorbing) and concrete (stopping) backstop.  This review is for the Do-All Bullet Box (Bullet Trap).  You can see the details of my backstop at this link (Poor Man's .22 Bullet Trap).  I purchased the Do-All Bullet Trap from Cabela's for 49.99 plus shipping and handling.

When the Bullet Trap arrived, it was boxed as shown below.  Throughout this review, clicking on a photo will bring up a higher resolution photo.


After opening the box, the basic components are shown below.


Also in the box were the following printed items; Instructions, Warnings, Registration & Returns. 


I arranged the pieces is their approximate locations for assembly.  Note that there were actually 10 screws and the photo only shows 9.  One screw was stuck in the bent piece of metal used for hanging the targets.


I placed the back and bottom pieces in their correct pistons for assembly so you can see how the trap  system is supposed to work.


Each side installs easily with the 5 screws and an Alan wrench provided with the bullet trap.


Before I got if fully assembled, I took measurements to understand the thickness of the steel.  The back plate thickness measured at 0.198" (2/10th".


The bottom plate thickness measured 0.107" (1/10th").


The side plate thickness measured 0.097" (1/10th").


When you are assembling it, you need to remember to put the back rod in place.  All of this information is covered in the instructions provided in the packaging.


Assembly was extremely easy and I had no issues.


Do-All advertises this as a 10"x11" target area.  I would say it is more realistically about 9"x11".  It seems you lose some area at the top by hanging the target and then also at the bottom due to the trap area.


Since I didn't want to deal with any potential stray bullet and holes in my wall, I placed the target on a shelf that I made quickly for my backstop.


The photo below shows the target with a 8.5"x11" target.


This photo shows the target after shooting two shots.  At this point I must be honest and say that I was not shooting at the minimum distance of 25 yards.  Actually I was at 7 yards while shooting my pistol.  After the first shot, I thought I felt something like blowing sand hitting me in the face.  I shot one more time and it was clear that I was having lead splatter bounce back 7 yards and hitting my face.  If you observe the upper target area closely, you can see that the splatter actually penetrated the paper as it bounced back.  Just to be clear, you need to understand that the difference between shooting at 7 yards versus 25 yards will be very small when you compare bullet energy.  Basically you will get the same results (energy transfer at the target like splatter & dust) at both distances.  Since I'm shooting a pistol and not a rifle, there is a possibility that a rifle at 25 yards may have more energy due to increased bullet velocity than a pistol at 7 yards.


I was shooting Winchester 36 Grain Xpert 22 Hollow Points.


After the first two shots, I dumped out all of the particles that I could from the bullet trap.  The trap appeared to collect only 26 grains of bullet fragments.  There were some particles stuck to the back of the target where the bullet impacted, so I will say there was another 10 grains still on the target.  This means that about 50% of the bullet turns into fragments that were not captured by the trap.  As long as you are 25 yards away, I don't see the fragments as a safety risk.  Since I was indoors and much closer than the minimum recommended range (and shouldn't be), I was getting a little concerned.


Next I cut some cardboard and put it behind the target so that it would make it more difficult for fragments to splatter forward from the back plate.


I took another 8 shots for a total of 10 shots so far.


After removing the target, you can see some small pricks on the upper surface area where lead was trying to splatter through the cardboard.


When I flipped the cardboard over, the below shows the lead splatter on the inside upper surface.


The next photo shows the dust accumulation on the lower trap area along with the fragments that were prevented from splattering out of the target and fell on the supporting shelf.


When I poured out all the fragments from the inside of the trap, I collected the pile below.


This pile of fragments weighed in at 146 grains.  8 bullets should be 288 grains.  Again the trap only collected about half of the lead bullets material.


At this point I realized I had a hazardous material issue starting to brew and decided to stop testing the trap with lead bullets.  My concern is that if I'm going to use this in my basement (which I shouldn't), I don't want a basement full of lead fragments and dust.  Take a look at the photo below and you will understand the dust issue a little better.  I also don't want lead dust to migrate to the rest of the house through the air conditioning system or tracking it through on my shoes.  Lead has real health issues as you can see from Wikipedia.  You can see how much lead dust was generated from only 10 shots by looking at the photo below.  A single shooting session with my pistols would be more like 100 shots and that would mean 10 times the fragments and dust.  If I did this on a fairly regular basis, this could create a real health issue.


As far as the trap goes, I was not able to detect any deformation on the back plate from looking at the back side of the trap, so I believe the 0.20" thickness must be good enough for lead bullets.


The photo below shows my Sig Trailside 22 pistol, the ammo used, and the first and only target I used with this bullet trap.


Bottom Line:
I would not recommend this trap for anyone who is interested in setting up a shooting range in their basement unless they plan to use lead free bullets.  Even if you do use lead free bullets, you will need to keep in mind that you will have splatter from the bullets that can come back at least 20+ feet.  Using cardboard, you could mitigate this issue.  Before I went the route of lead free bullets, I would contact Do-All Outdoors and get their input on using lead free bullets with their product.  The trap clearly stops the normal lead bullets and I could see it being used in an outdoors situation where you are at the minimum distance of 25 yards.  I do still have concern that even outdoors you will get lead dust generated and whoever is changing out targets will get it on their hands.  Being a survivor of a serious blood disorder and knowing what I know now about the dust generated, I couldn't see sending any of my children down range to change out a target on this trap.  This brochure from the Texas Department of State Health Services gives more information on the lead dust concern.  In the end I returned this product to Cabela's and asked them to update their website to at least make sure they point out that this product should be used outdoors only and asked that they look into these concerns on this product.

I will try to contact Do-All Outdoors and get some clarification on the use of this trap outdoors and the potential lead issues.  Maybe they can shed some light on these risks and considerations they made when developing this product.  I will update this post with anything I find out.

For now, I'm going back to my development of my Poor Man's 22 Bullet Trap with material that will absorb the bullet and not produce splatter and dust so I can use it in my basement.


Wednesday, September 15, 2010

Poor Man's .22 Bullet Trap

The other day I was talking with a buddy from work and he reminded me of how easy it is to setup a simple .22 bullet trap in your basement so you can get a little shooting time in without leaving the house.  I originally did this years ago with cardboard, a piece of steel channel, and then set this up in front of my cinder block wall in my basement.  Today, the ideal location for me to shoot does not have a concrete or block wall in the best area for shooting.  After looking around the basement, I realized I had a bunch of unused and scrap wood available for the project, so I decided to do a little research on the Internet.  After reading several articles, I decided to take the approach of letting the bullet penetrate some softer material and then be stopped by a solid structure (similar to my old setup).  Penetrating the softer material should prevent any bullet splatter or bounce back.  I did some simple tests by stacking 2x6 scraps on their wide sides and shooting to see how far a single bullet would penetrate.  The test bullet made it through two boards and into the third (greater than 3" and less than 4.5"), but not penetrating the third board.

My final decision was to make a wooden form, pour about 3" of concrete, and then add three layers of scrap wood on top.  The three layers should protect against any bullet ever splattering or bouncing back off the concrete unless it happened to exit a worn out hole.  The only materials I purchased for this project were three 80 pound bags of Quickcrete for $11.00.

Step 1 - Design
I decided on a 36"x36" concrete area with the bottom of the concrete starting at about 40" off the ground.  This will give plenty of room on the target area to have multiple targets and also be at a height to shoot in a standing position just like you would at a pistol range.

Step 2 - Build Basic Form
I had a half sheet of 3/4" OSB and three new pressure treated 2x4x8' that were the remainder from another project.  My son and I cut this wood to build a form that would create a 36"x36" concrete area and the outside 2x4s also function as the legs to get main target area 40" from the floor.  I also put a bead of caulk on all the inside joints because I didn't want watery cement mix to leak all over the basement floor.  One final thing was to drive some nails on the inside of the form area with the a good portion of the nail exposed so it would be embedded in the concrete.  This just helps to hold everything together.

Step 3 - Mix Concrete
We started out mixing the concrete in a bucket, but quickly abandoned this and actually mixed it all in the form area.  We used the three 80 pound bags of Quickcrete (the ones with the rocks) and half of another bag that I had on hand.  This quantity worked out nice and ended up being about 3.25" of concrete.  I let this cure for about 18 hours before going to my next step.


Step 4 - Add First Layer of Wood
Since all the longer scrap wood I had on hand was only 3/4" thick, my first layer ended up being part OSB and some pine 1x4 boards.  You can see this in the photo in Step 5.

Step 5 - Add Second Layer of Wood
For the next layer, I framed in the area and then added a layer of wood on the inside.  For the inside boards I only used one regular nail in the middle of the board and then 2" airgun brads on the corners.  My thoughts here were to make it secure enough to hold a second layer, but not so tough that replacing a board would be a major challenge.


Step 6 - Add The Final Layer
Just like with the last layer, I framed in the area.  This time I used some 2x6 material for the outside frame.  Then I added the interior boards going in a pattern that would be 90 degrees to the second layer boards.  I only nailed these in with the 2" brad nail gun so removal would be real easy for replacement when worn out.  Honestly I would be surprised if I ever replace a board below this level.  Time will tell.


Step 7 - Relocate and Stand Up
This ended up being the biggest challenge.  The total unit weighed between 300 and 400 pounds.  I was able to stand it up on it's top edge (upside down) and push it across the floor to relocate it to the correct area. Once there, I got it flat on the ground with the legs against the wall and front side facing down.  Next was the feat of standing it up.  We kept lifting one side at a time until I had abut five 2x4 blocks holding the top edge off the ground.  From there it was all muscle, but we got it standing up.  Because of the layers of boards added to the front, the unit wants to fall back on you.  Make sure you hold it in place while positioning it against the wall.


Step 8 - Anchoring To The Wall
I think you can easily see the value in this step.  If this ~350 pound mass happened to fall on you, it would be a major injury.  Just like with the other supplies, I anchored it with stuff I already had around the basement.  On one side I used a shelf bracket and the other I bent a piece of metal and screwed this to existing studs.


Step 9 - Lighting & Targets
I used a clamp-on work light to provide some additional lighting directly on the target area.  I also hung one of my fancy "A Real Man's Objective Reviews" targets, but most of the time I will staple a sheet of paper and draw a large dot with a chisel tip marker.


Step 10 - Enjoy!

My setup actually works out that I have a 7 yard shot standing behind my table saw and a total 14 yard shot maximum.  This should be more than sufficient for me to work on my pistol shooting skills.  The below photo shows my first target using my Sig Arms Trailside 22 Pistol while shooting freehand at 7 yards.  Clearly you can see why I want more practice.


After removing the target, the photo below shows the bullet entry into the wood for these first 10 shots.  They are nice clean holes going in and nothing coming back.


The next photo shows the end of a short first session shooting with my son.  I think you can see that after a couple of sessions the concrete will be the structure finally stopping the bullets.  The middle group on the left has 8 bullets stacked in on top of each other and were shot from a Ruger 22 Charger from 14 yards.  At some point I will use a stiff wire (coat hanger) and stick it down some of these holes to start measuring erosion of the concrete, but I think I have many more sessions before that is a real concern.


For those of you who may be worried that a stray bullet could make it outside the 3'x3' area, the wall behind that area of the house is all brick.  If for some reason we did miss the bullet trap, it would stop when it hit the bricks.

Bottom Line (Original Post):
After this first session, I'm really pleased with how this bullet trap has turned out.  Only time will tell, but I believe I have a pretty durable setup.  As it gets more use and I gain more knowledge about the setup I will update this post.

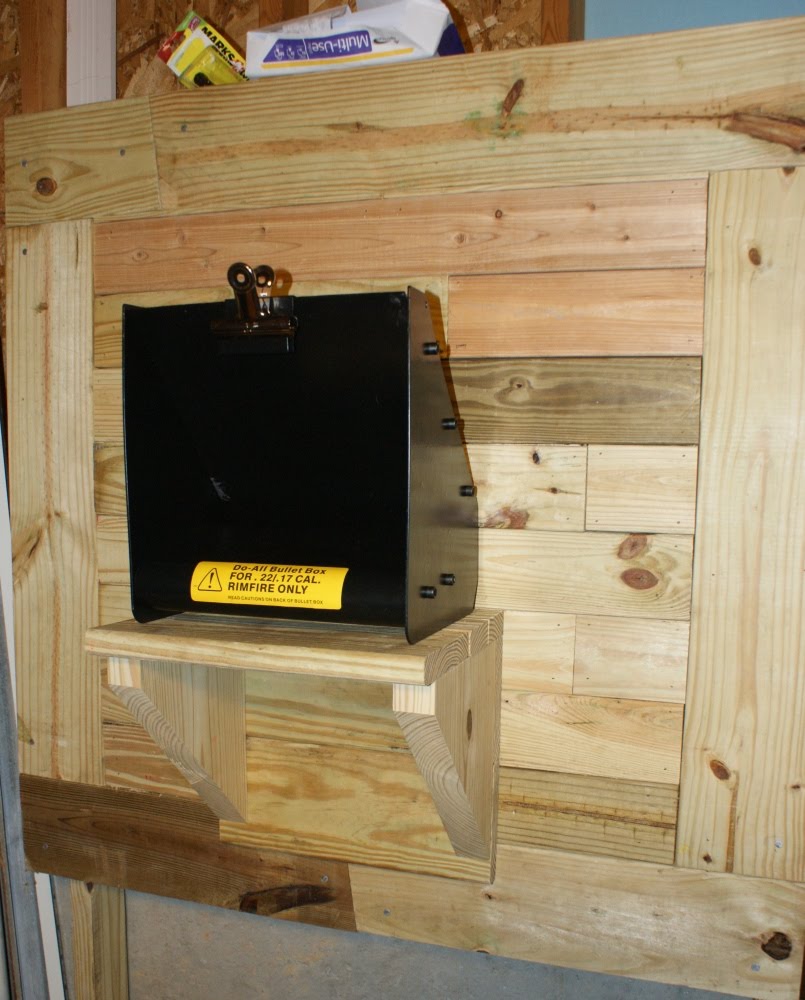
Just for kicks, I also purchased an inexpensive steel 22 bullet trap from Cabelas and plan to do a normal review.  The combination of these two may be the ticket to keep me from having to replace sections of wood on my backstop and for having a larger area for trapping bullets since the steel bullet trap is small (10"x11").
Update: You can see the Do-All 17/22 Bullet Box review at this link.  I would not reccomend using this trap on any indoor range at your house.  Details are in the review.

Update #1:
After the second session of shooting, I learned something.  The bullets stack up quickly in the wood if you put a bunch of shots in the same general area.  I noticed this when one of the boards on the top layer started backing away from the surrounding boards.  I tried knocking it back in, but something was clearly in the way.  After removing the board (easy to do since I had only used the 2" brads from my nail gun and maybe this is also why it started backing away so easily), I could see that the lead bullets had stacked up and started wedging against this board.  The photo below shows what it looked like when I removed the top board.


These were lead pieces that I removed from the wood.  There was large chuck that had fused together to produce a 3/4" size nugget.


Stacking bullets on top of each other is the goal for shooting, but this creates problems for this type of bullet trap.  You can see from the holes shot in the wood that there were some areas where the lead would get packed in a very local area.


After cleaning all the debris and lead out of the wood, I put this board back in place to see what will happen next.  In my case, scrap wood is cheap and the end goal of trapping the bullets is still successful. 


Bottom Line (Update #1):
Maybe I'm trying to reinvent the wheel here, but at least I'm having fun.  Is this wooden/concrete bullet trap perfect? Clearly not.  Is it stopping the bullets like I planned?  Clearly yes.  As I keep shooting and learning more about using this method, I will continue to update this post.

Update #2:
I was considering using a steel bullet trap on the front of this wooden/concrete backstop.  You can see the Do-All 17/22 Bullet Box review at this link.  I would not reccomend using this steel bullet trap on any indoor range at your house.  Details are in the review.